Hello! The summer is almost here, and I’ve been experimenting with new and delicious recipes, as always. The bounty of summer brings a nice variety of local and fresh fruits and vegetables, and it is fun to play with them in the kitchen and taste new flavorful creations.
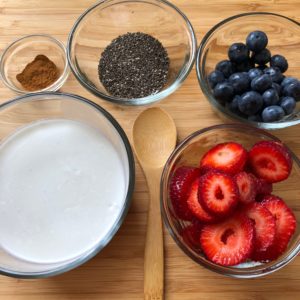
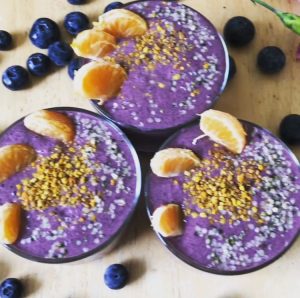 Today, I’d like to share a very simple but super delicious smoothie – a blueberry acai smoothie. I decided to make my own version after I tasted a blueberry acai smoothie bowl in a local raw food cafe (The Judahlicious cafe in San Francisco). Their acai bowl was amazing. However, mine turned out pretty good, as well! For this recipe, you will need raw cashews, frozen blueberries, frozen acai, dates, and filtered water.
You will need the following equipment: a good blender (such as Vitamix, Blendtec, or a similar one), and serving glasses.
I like to use raw, unsalted, soaked cashews because, after being soaked overnight, they become soft and plump and have a different taste and texture. Depending on the type of raw dried cashews, they can expand up to two times in their size after soaking. For example, for this recipe, I soaked 1 cup of dried cashews overnight, and they expanded to 2 cups. Note that the standard nutritional information such as the calories, fat, protein, and carbohydrate content, is usually provided for the dried nuts.
As for the blueberries, in this recipe, the frozen ones worked very well; I did not have to add any ice. I usually buy fresh, organic, and local blueberries that are in season and freeze them. Also, I like keeping some of the wild frozen blueberries in stock. The dates that I love to use in my recipes are the Medjool dates.
For this recipe, I used a frozen acai that was available at Trader Joe’s. Also, different acai powders or purees are available at other retailers; however, I have not tried them all in my recipes yet.
The recipe:
- 2 cups raw cashews, soaked overnight and drained (an equivalent of 1 cup of raw, dried, unsoaked cashews)
- 4 cups of frozen blueberries
- 4 cups of water
- 3 dates, pitted
- 1 packet of frozen acai (about 100 grams)
Yield: 8 cups, Serving size – 1 cup
Method of preparation:
- Place cashews, blueberries, acai, dates, and water into a blender
- Blend well until smooth and creamy
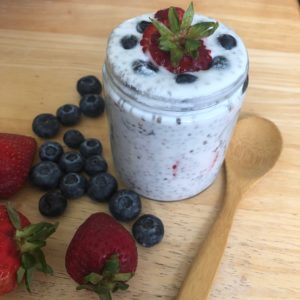
- Serve immediately or store in a refrigerator for up to 3 days.
- Before serving, decorate with your favorite nuts, seeds, herbs, or spices.
Enjoy the deliciousness!
Nataliya
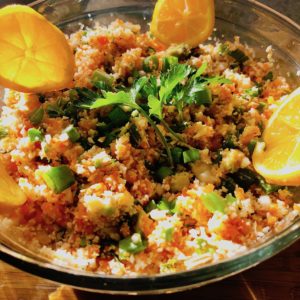 I’m excited to share with you my version of the recipe called Cauliflower “Rice”.
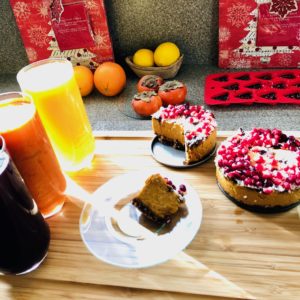 Happy New Year to everyone I know and don’t know yet!
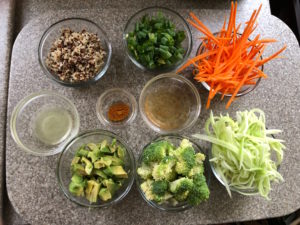
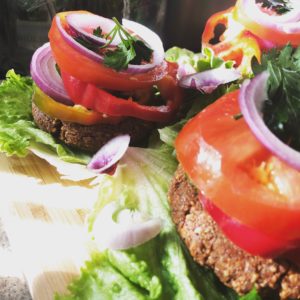 I’m excited to finally share with you a very delicious recipe: Raw Vegan “Burgers”!
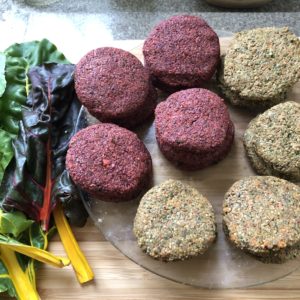 I just wanted to mentioned one more thing: some people pay attention to the color of the vegan “burger”, and, as I learned, it mostly depends on the ingredients that you use.
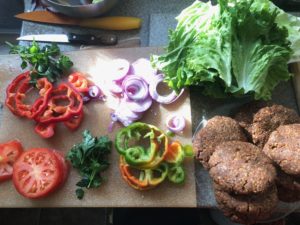 What you will need:
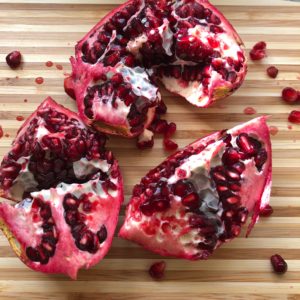 Do you like pomegranate seeds? They are available only once a year, usually around the holiday season, in November and December.
 You will need the following equipment:
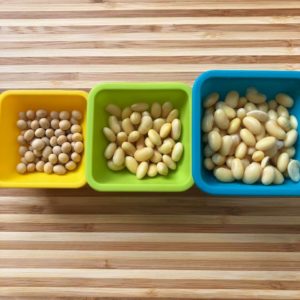 Recently, I had to cook a batch of soybeans for a client. Yes, they were organic and non-GMO, and it took some time to find. If you are lucky to live near a Natural Food Store such as Rainbow Grocery in San Francisco or others that carry them in bulk, that’s great. Online shopping is another option; the Nuts.com, Amazon, and some farmers sell the dried beans online.
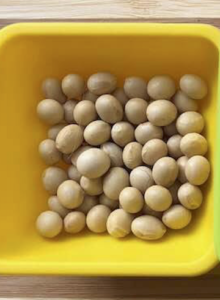

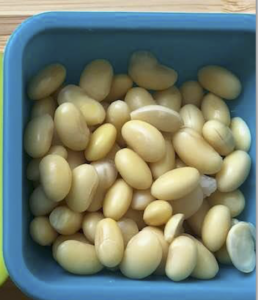 Fully cooked soybeans. They expanded just a bit more during cooking and sweating process.
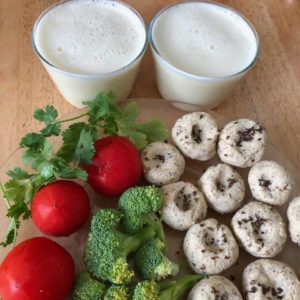 Homemade soymilk and the bean balls.
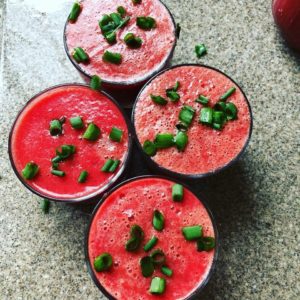 It is the end of summer and I like to celebrate it with vegetable juice prepared from some local and seasonal produce.
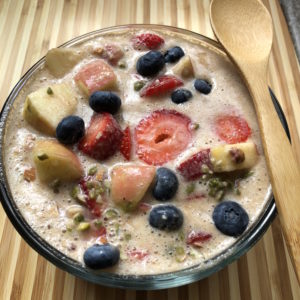 Hello!
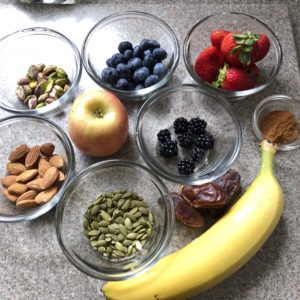
 Hello everybody,