Raw Vegan Cheesecake

Raw Vegan Cheesecake

Nataliya Bryantsev "Being in Best Health" , https://beinginbesthealth.com/raw-vegan-cheesecake/
Raw Vegan Cheesecake
Happy weekend!
Inspired by raw vegan recipe creators, I was looking for a no-oil added raw vegan version of a cheesecake. Most of the recipes call for coconut oil or coconut milk. While coconut oil or milk can make cheesecake very smooth and rich, it also adds a handful of calories and fat.
I wanted to make a cheesecake using only nuts and fruit, without added oils, sugars, or colorants. So that I could have a cake and eat it, too. And not to feel guilty, heavy, sleepy, or comatose after eating a dessert.
By the way, do you know that a piece of cheesecake can contain up to 1,000 cal or even more? This recipe provides only 390 calories per slice; moreover, it is low in salt, has no added sugars and oils, and zero artificial ingredients and trans fats.
Here we go: for this recipe, I used soaked raw cashews, fresh berries, and dates. That’s it. And it was heavenly.
Equipment:
A 9-inch springform pan, blender with a plunger (I used a Vitamix), parchment paper, and bowls.
Ingredients:
3 cups of raw cashews - soak them overnight or for 8 hours in cold water to get about 6 cups of soaked nuts (they expand about twice in size).
Blueberries (fresh or frozen) - 1/3 cup
Raspberries and blackberries (fresh or frozen) - 1/3 cup
Dates Medjool, without pits - 14
Filtered water - at least 3 cups
This recipe is 100% plant-based, gluten-free, flour-free, and has noadded oils, sugars, colorants, or salt. I made it for the fourth of July holiday.
Prep Time 1 day
Course Dessert
Cuisine American
Servings 8 slices
Calories 392 kcal

Equipment

  • 9-inch springform pan
  • blender with a plunger
  • bowl for soaking nuts
  • parchment paper - a square of 12x12 inches

Ingredients
  

  • 3 cups raw dried cashews - Nuts reqiure an overnight or 8-hour soaking in 4 cups of cold water
  • 1/3 cup blueberries - I used fresh
  • 1/3 cup a mix of raspberries and blackberries - I used fresh
  • 14 pieces dates, Medjool, without pits - take care to remove the pits and stems
  • 3 cups filtered water - for blending the ingredients

Instructions
 

  • 1. This step needs to be done in advance. Prepare the nuts: Soak the nuts for 8 hours or overnight in 4 cups of cold water. Drain the soaking water, rinse, and drain again.
    2. Prepare the springform pan: Release the lock, cover the bottom of the pan with a parchment paper, and lock in place.
    3. Prepare the white layer:
    Measure 2 cups of soaked cashews, add 1/2 cups of water, and blend into a thick mixture using the plunger. Add a bit more water if a blender stops. Add 6 dates and blend well. Add a bit more water if needed. Taste for sweetness and add a few more dates if needed. Transfer the white mixture into the pan and let it freeze for at least 4 hours or until firm.
    4. Prepare the red layer:
    Divide the remaining cashews into two parts (about 2 cups each). Put 1 part of cashews into a blender, add raspberries, 1/4 cups of water, and blend with a plunger. Add a bit of water if blender stops and blend again. Add 4 dates and blend well. Taste for sweetness and add a few more dates if needed. Take the pan out of the freezer and transfer the red mixture on top of the frozen white mixture, and let it freeze for at least 4 hours or until its firm.
    5. Prepare the blue layer:
    Put the remaining cashews into a blender, add blueberries, 1/4 cup ofwater, and blend with a plunger. Add a bit of water if blender stops. Add 4 dates and blend well. Taste for sweetness and add a few more dates if needed. Take the pan out of the freezer and transfer the blue mixture on top of the frozen red mixture. Let it freeze for at least 4 hours. Decorate the top of the cake with berries and return to a freezer for another 12 hours to set.
    6. Serve the cake:
    To slice a cake, remove it from the freezer. Release the lock and take the cake out of the pan. Peel the parchment paper away from the bottom of the cake. Put the cake onto the bottom of the pan and let it thaw for 5 minutes. Slice with a sharp knife into 8 or 10 pieces. Put the pan back on, lock it, and put the cake in the freezer. Store it in the freezer for up to 2 weeks. To serve a cake, take out slices and let them thaw at room temperature for about 15 minutes before eating.
    This recipe is 100% plant-based, gluten-free, dairy-free, flour-free, and has no added oils, sugars, colorants, or salt.
    Nutritional analysis by Chronometer: One serving (1 slice out of 8) contains:
    Calories - 392, protein - 9.75 g, fat – 21.5 g, carbohydrates - 42.8 g, trans fats – 0 g, saturated fat – 3.8 g, monounsaturated fat – 11.6 g, fiber – 5 g, sodium- 6.4 mg, and added sugars – 0 g.
    Enjoy!
    Nataliya @ https://beinginbesthealth.com/
    References:
    Andrews, A. (2019). Raw strawberry cheesecake: gluten-free. https://lovingitvegan.com/raw-strawberry-cheesecake/
    Baird, L. & Rodwel, J. (2005). The complete book of raw food.Healthy Living Books: New York, NY
    Chronometer. (2020). Recipe analysis. https://cronometer.com/
     
Keyword dairy-free, flour-free, gluten-free, gut health, no-bake, noaddedoil, noaddedsugar, plant-based, raw, vegan

I hope you try this recipe. Let me know how it turned out for you.

Best wishes,

Nataliya


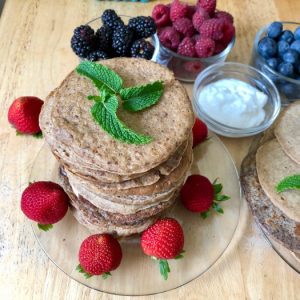
Quinoa Pancakes

Happy Independence Day weekend to everybody! It is a middle of the year and almost a middle of the summer. What is your favorite summer-time activity? For me, it is the appreciation of the long days filled with the sunshine and the delicious and colorful summer foods. 

Today, I’m sharing with you one of my favorite recipes – the quinoa pancakes.
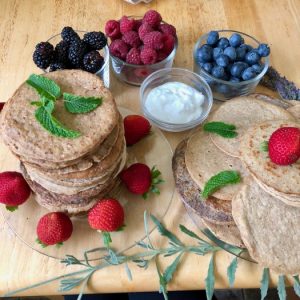
It needs just a few ingredients, is easy to make, and tastes very good. Actually, both the sweet and savory versions of this recipe can be enjoyed year-round. 


You will need the following ingredients:
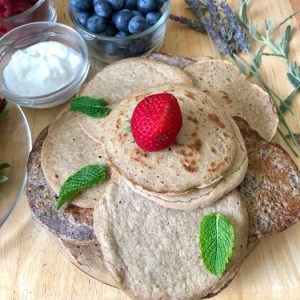
  • Quinoa (white, red, or multicolored),
  • ripe banana,
  • flax seeds, 
  • water.

That’s it. You may use a little bit of coconut oil, however, it is optional if you use a non-stick skillet.

You will need this equipment: a bowl, blender, and non-stick skillet. The amount of preparation time can be reduced if you have more than one skillet. I typically use 3 small non-stick skillets, and in this case, the total preparation time takes about 5-7 minutes. 

What I love about this recipe is that the pancakes have a neutral taste and can be enjoyed with both sweet and savory meals or snacks. As a sweet version, I like to serve them with berries, fruits, and coconut yogurt. For a savory twist, I serve them with veggies, salads, and dressings (taco-like style). On this image below, you can see 3 pancakes, each served with the arugula leaves, slices of tomato and red onion, and avocado cubes. In this version, the pancakes work as flatbreads or soft tacos. 
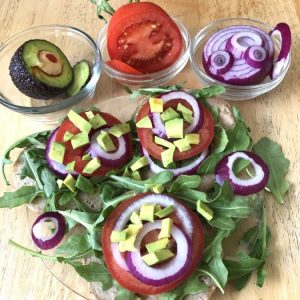
Additionally, I soaked and sprouted the quinoa seeds, which is an easy step that can improve the digestibility and nutrient availability. Moreover, soaked and sprouted quinoa gives you more pancakes if compared with those made from the unsoaked quinoa. Note that this recipe does not need any flour; the whole quinoa seeds were soaked and sprouted and blended together with banana, flax seeds, and water. Here is a full recipe, enjoy!
Download the recipe: Quinoa Pancakes

By the way, it is the middle of the year, and I’m wondering how are your new year resolution goals doing? How successful have you been so far? Which obstacles came your way?

Let’s discuss how I can help you to get back on track during the next 6 months.

Our first 20-minute discovery session is free of charge, and I can work with you as a wellness coach or/and a nutrition consultant, depending on your needs. Contact me today, I’m happy to see how I can help!

In best health,

Nataliya.

Cauliflower “Rice”

Hello!

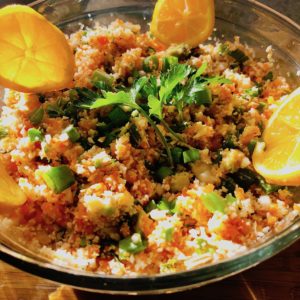
I’m excited to share with you my version of the recipe called Cauliflower “Rice”.
This recipe is so quick to make that it became one of my staples!

I wanted to highlight the benefits of this recipe:

It is 100% grain-free and gluten-free!
It’s made with fresh vegetables and herbs – it means that your body will get lots of fiber, antioxidants, vitamins, and minerals!
It is low in fat and calories and has no added oil – it means it is perfect for those who watches the calories or tries to lose weight. (You can certainly add some olive, avocado or sesame oil to it if you like; however, I encourage you to try it first and see how it tastes to you.)
It has no additives or sweeteners; however, it tastes slightly sweet and pleasantly delicious because of the natural carbohydrates present in carrots and cauliflower.
This recipe is 100% raw and uncooked; however, you can steam or cook the cauliflower (and even carrots) if this is your preference.

You will need the following ingredients:

cauliflower, carrots, onion, scallion, avocado, lemon juice, apple cider vinegar,  and optional Himalayan salt.

You will need this equipment:

a cutting board, a knife, a food processor (I used a Cuisinart), and a mixing bowl

Ingredients:

2 cups cauliflower florets, chopped
3 carrots, sliced
1/2 onion, sliced
1 scallion, chopped
2 Tbs parsley, chopped
1 avocado, cubed
1/2 lemon, juiced
1 Tbs raw apple cider vinegar
Optional: 1/16 tsp sea salt

Yield: 4 cups

Serving size: 1 cup

Method of preparation:

Put all ingredients (except avocado) in a food processor and pulse until the mixture combines homogenous.
Transfer the mixture into a bowl, add the cubes of the avocado, and mix it all well.
Test the taste and adjust as needed by adding more salt.
Serve immediately with any meal or as a snack.
Store in a refrigerator for up to 3 days.

Download the Recipe” Cauliflower rice”

Here is a quick video on how to make this delicious recipe:
https://www.youtube.com/watch?v=ctX8f-OiWqE
Let me know if you have any questions!

Enjoy!

Nataliya.

“Burgers”! Vegan and Raw

I’m excited to finally share with you a very delicious recipe: Raw Vegan “Burgers”!
I made them for the first time around Thanksgiving holiday, and later I experimented with the recipe and tried a few different versions of it.

The bottom line: these “burgers” do not have any animal ingredients, so please do not expect that the taste and texture will be just as it usually is in an animal-based product.

However, these vegan “burgers” are still super delicious, satisfying, filling, and quite addictive in a good way (meaning that it could be difficult to stop after eating just one “burger”). The recommended serving size for this recipe is about 2 or 3 “burgers”, depending on their size, so it means you can eat more than one!

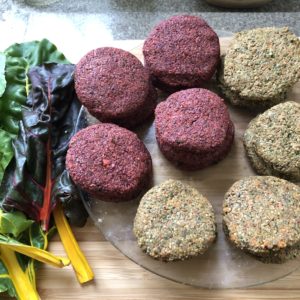
I just wanted to mentioned one more thing: some people pay attention to the color of the vegan “burger”, and, as I learned, it mostly depends on the ingredients that you use.
This recipe will have a brownish-reddish-purple color because of the beets, and if you decided to replace the beets with a green vegetable (such as celery), the color of your product will be brownish-green. As you can see on this picture, the colors are different, but the taste and texture will be similar.

What you will need:

  • Ingredients:
    • nuts, seeds, vegetables, herbs, and spices.
  • Equipment:
    • a knife, cutting board, food processor (I like Cuisinart), a large mixing bowl.

Method of preparation:

  • Process the nuts and seeds into a fine powder.
  • Process the vegetables and herbs into a smooth mass.
  • Combine the dry and wet ingredients, form patties, and assemble them into a “burger” meal.
  • The whole process takes about 15-20 minutes.

Download a full recipe here: Burgers raw and vegan

Ingredients:

  • 1 cup walnuts
  • 2 cups sunflower seeds
  • 1 stalk celery, chopped (1/2 cup)
  • 1 small beet, chopped (1/2 cup)
  • 1 carrot, chopped (1 cup)
  • 1 small handful parsley, chopped
  • 2 Tbs ground flax seeds
  • 3 Tbs nutritional yeast
  • 2 Tbs dried herbs (Italian seasoning)
  • Optional: 1/16 tsp sea salt

Yield: 5 cups or 9 burgers, Serving size: 2-3 “burgers”

Method of preparation:

  1. Process spices, nuts, and seeds in a food processor into a powder and set aside in a large mixing bowl.
  2. Process all vegetables and fresh herbs in food processor into a smooth mass.
  3. In a large mixing bowl, combine processed dried and wet ingredients using a large spoon or your hands, until it becomes a homogenous mass (if it is too wet, add more of the dried ingredients such as extra powdered nuts or seeds). The final texture should be not too soft or too wet.
  4. Measure about 1/2 cup of the mixture to make one patty.
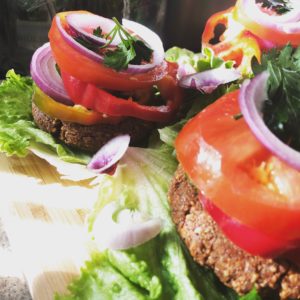
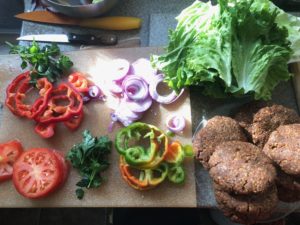
  5. To serve, place a patty on a lettuce or cabbage leaf, and decorate with slices of bell peppers, tomatoes, onions, and parsley.
  6. Store in a refrigerator for up to 3 days, freeze up to 2 weeks, or serve immediately and enjoy!

Finally, I’m including my quick video with some ideas on how to make a “burger” meal and serve it in a beautiful and delicious way. Hope you find it helpful.

The inspiration for this recipe came from the book by Baird and Rodwell (referenced below).

Bon appetit and happy holidays!

Nataliya.

https://www.youtube.com/watch?v=wi43YVpgEz0&t=6s

References:

Baird, L. & Rodwel, J. (2005). The Complete Book of Raw Food. Healthy Living Books: New York, NY