
Raw Vegan Cheesecake
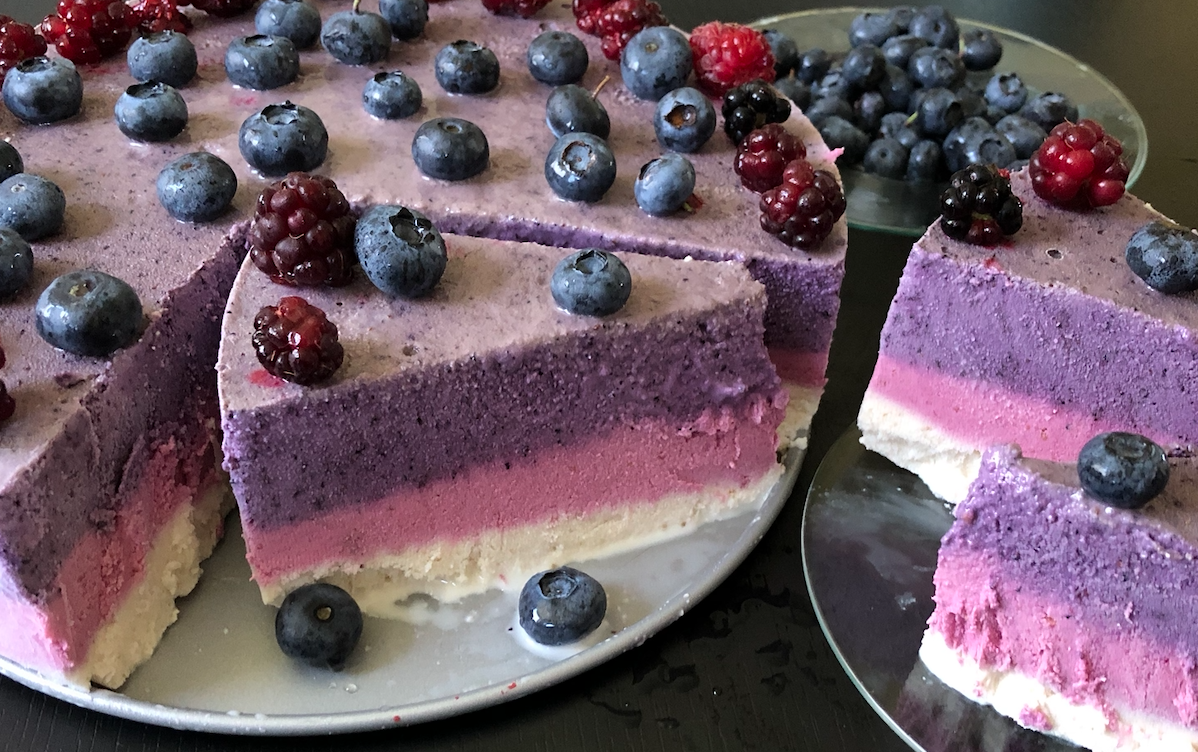
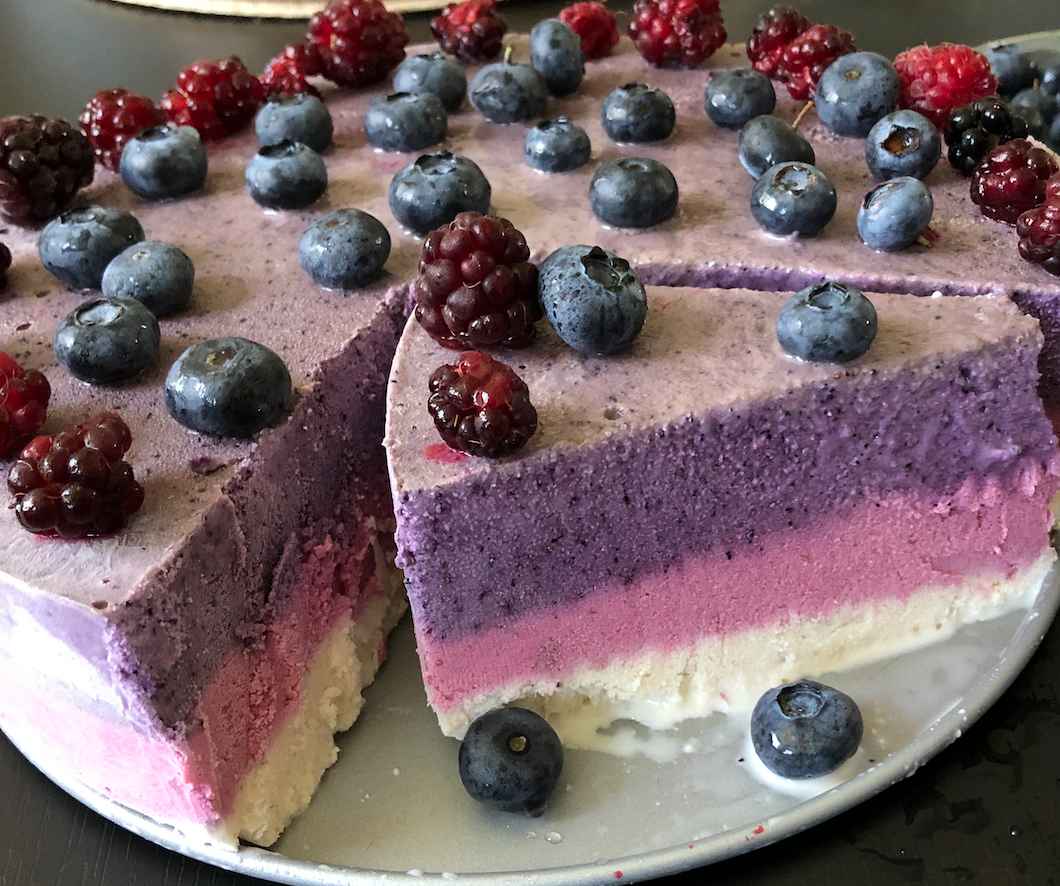
Raw Vegan Cheesecake Happy weekend! Inspired by raw vegan recipe creators, I was looking for a no-oil added raw vegan version of a cheesecake. Most of the recipes call for coconut oil or coconut milk. While coconut oil or milk can make cheesecake very smooth and rich, it also adds a handful of calories and fat. I wanted to make a cheesecake using only nuts and fruit, without added oils, sugars, or colorants. So that I could have a cake and eat it, too. And not to feel guilty, heavy, sleepy, or comatose after eating a dessert. By the way, do you know that a piece of cheesecake can contain up to 1,000 cal or even more? This recipe provides only 390 calories per slice; moreover, it is low in salt, has no added sugars and oils, and zero artificial ingredients and trans fats.Here we go: for this recipe, I used soaked raw cashews, fresh berries, and dates. That’s it. And it was heavenly.Equipment:A 9-inch springform pan, blender with a plunger (I used a Vitamix), parchment paper, and bowls. Ingredients:3 cups of raw cashews - soak them overnight or for 8 hours in cold water to get about 6 cups of soaked nuts (they expand about twice in size).Blueberries (fresh or frozen) - 1/3 cupRaspberries and blackberries (fresh or frozen) - 1/3 cupDates Medjool, without pits - 14Filtered water - at least 3 cupsThis recipe is 100% plant-based, gluten-free, flour-free, and has noadded oils, sugars, colorants, or salt. I made it for the fourth of July holiday.
Ingredients
Equipment
Method
- 1. This step needs to be done in advance. Prepare the nuts: Soak the nuts for 8 hours or overnight in 4 cups of cold water. Drain the soaking water, rinse, and drain again.2. Prepare the springform pan: Release the lock, cover the bottom of the pan with a parchment paper, and lock in place.3. Prepare the white layer:Measure 2 cups of soaked cashews, add 1/2 cups of water, and blend into a thick mixture using the plunger. Add a bit more water if a blender stops. Add 6 dates and blend well. Add a bit more water if needed. Taste for sweetness and add a few more dates if needed. Transfer the white mixture into the pan and let it freeze for at least 4 hours or until firm.4. Prepare the red layer:Divide the remaining cashews into two parts (about 2 cups each). Put 1 part of cashews into a blender, add raspberries, 1/4 cups of water, and blend with a plunger. Add a bit of water if blender stops and blend again. Add 4 dates and blend well. Taste for sweetness and add a few more dates if needed. Take the pan out of the freezer and transfer the red mixture on top of the frozen white mixture, and let it freeze for at least 4 hours or until its firm.5. Prepare the blue layer:Put the remaining cashews into a blender, add blueberries, 1/4 cup ofwater, and blend with a plunger. Add a bit of water if blender stops. Add 4 dates and blend well. Taste for sweetness and add a few more dates if needed. Take the pan out of the freezer and transfer the blue mixture on top of the frozen red mixture. Let it freeze for at least 4 hours. Decorate the top of the cake with berries and return to a freezer for another 12 hours to set.6. Serve the cake:To slice a cake, remove it from the freezer. Release the lock and take the cake out of the pan. Peel the parchment paper away from the bottom of the cake. Put the cake onto the bottom of the pan and let it thaw for 5 minutes. Slice with a sharp knife into 8 or 10 pieces. Put the pan back on, lock it, and put the cake in the freezer. Store it in the freezer for up to 2 weeks. To serve a cake, take out slices and let them thaw at room temperature for about 15 minutes before eating.This recipe is 100% plant-based, gluten-free, dairy-free, flour-free, and has no added oils, sugars, colorants, or salt.Nutritional analysis by Chronometer: One serving (1 slice out of 8) contains:Calories - 392, protein - 9.75 g, fat – 21.5 g, carbohydrates - 42.8 g, trans fats – 0 g, saturated fat – 3.8 g, monounsaturated fat – 11.6 g, fiber – 5 g, sodium- 6.4 mg, and added sugars – 0 g.Enjoy!Nataliya @ https://beinginbesthealth.com/References:Andrews, A. (2019). Raw strawberry cheesecake: gluten-free. https://lovingitvegan.com/raw-strawberry-cheesecake/Baird, L. & Rodwel, J. (2005). The complete book of raw food.Healthy Living Books: New York, NYChronometer. (2020). Recipe analysis. https://cronometer.com/
I hope you try this recipe. Let me know how it turned out for you.
Best wishes,
Nataliya
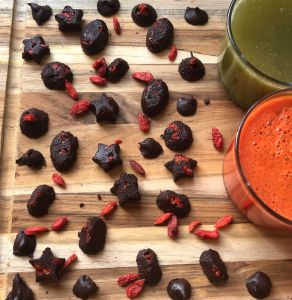
 Hello! Several years ago, I learned how to make raw chocolates from scratch. I believe that it was a recipe by Any Phyo that I found in the book and wanted to give a try as the chocolate-making at home seemed to be a pretty straightforward process.
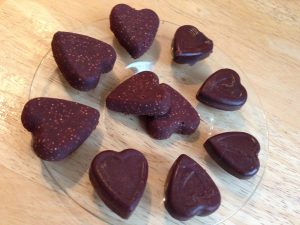
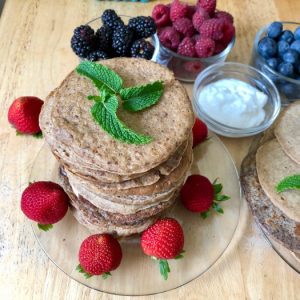 Today, I’m sharing with you one of my favorite recipes – the quinoa pancakes.
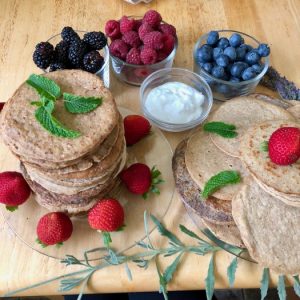 You will need the following ingredients:
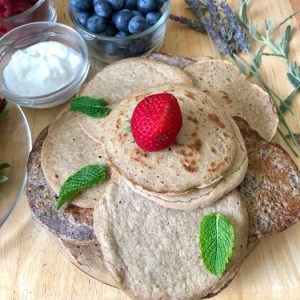 What I love about this recipe is that the pancakes have a neutral taste and can be enjoyed with both sweet and savory meals or snacks. As a sweet version, I like to serve them with berries, fruits, and coconut yogurt. For a savory twist, I serve them with veggies, salads, and dressings (taco-like style). On this image below, you can see 3 pancakes, each served with the arugula leaves, slices of tomato and red onion, and avocado cubes. In this version, the pancakes work as flatbreads or soft tacos.
 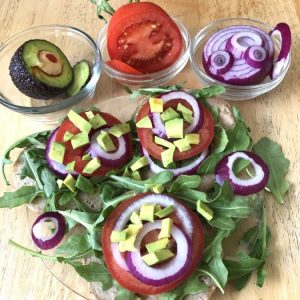 Additionally, I soaked and sprouted the quinoa seeds, which is an easy step that can improve the digestibility and nutrient availability. Moreover, soaked and sprouted quinoa gives you more pancakes if compared with those made from the unsoaked quinoa. Note that this recipe does not need any flour; the whole quinoa seeds were soaked and sprouted and blended together with banana, flax seeds, and water. Here is a full recipe, enjoy!
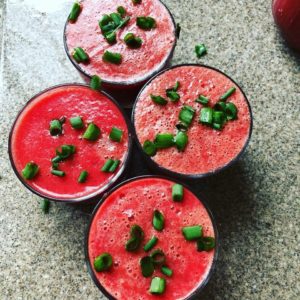 It is the end of summer and I like to celebrate it with vegetable juice prepared from some local and seasonal produce.
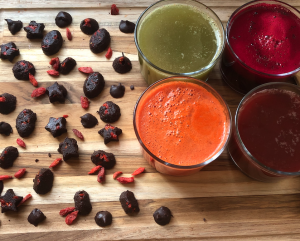