
Hello! This week, I made my own herbal powders from whole, organic, recently harvested herbs for the first time! Once I opened the packages with the Motherwort leaves and Hawthorn berries, the inspiring process of creation has started!
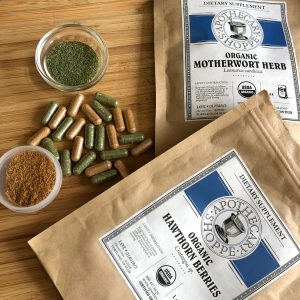
I used a mortar and pestle and Vitamix blender to crush and pulverize all components of these herbs into a fine powder. Both of these herbal powders smelled and tasted so fresh and looked so bright!
The Hawthorn Berries powder and capsules:
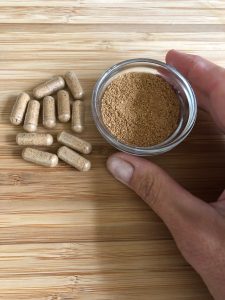 Modern herbal therapy implements Hawthorn berries, leaves, and flowers. The Hawthorn plant has beneficial cardiovascular effects* (Holubarsch, Colucci, & Eha, 2018).
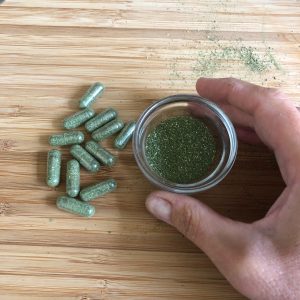
The Motherwort powder and capsules: The Motherwort plant has anti-inflammatory, antioxidative, antimicrobial, tissue-protective, and sedative effects* (Fierascu et al., 2019).
 I used to take herbal powders prepared by the Ayurvedic practitioners as a Complementary and Alternative Medical (CAM) approach for different purposes: to relieve stomach discomfort, alleviate muscle pain, improve digestion and elimination, decrease stress, and reduce congestion* (Patwardhan, 2014). I loved Ayurvedic herbal preparations! Each one smelled and tasted differently and affected my body and mind in a positive way.
The herbal powders can be taken in a powdered form or as capsules. The herbal powders made at home can be the purest and the freshest ones, as you can select the best quality herbs (organic, wild-crafted, or even home-grown) and the best quality capsules while avoiding any other ingredients that seem unnecessary (fillers, pesticides, additives, preservatives, etc.). I was pleasantly surprised when I discovered that the Apothecary Shoppe listed the date of the harvest on each package with whole herbs. You can make the herbal powders in small batches to ensure freshness and maximum potency and prevent rancidity. Each batch can be stored in a refrigerator with a moisture absorbent packets.
It is best to contact a Certified Herbalist, an Ayurvedic Practitioner, or Naturopathic Doctor to inquire which herbs can be a good fit for your body as a part of the CAM approach to healing and wellness. In the United States, about 38% of adults (every 4 in 10) and 12% of children (every 1 in 9) are using some type of CAM.
The most common forms of CAM used in the U.S. include nutrition and diet-based therapy, herbs, Yoga, Pilates, Ayurveda, Traditional Chinese Medicine, energy healing/Reiki, and many others (John Hopkins Medicine, 2019; NIH, 2017). The CAM approaches are non-mainstream and can be used together with conventional mainstream medicine (NIH, 2019).
Contact me today to discuss your nutrition goals! Our initial 20-minute discussion is free of charge. To help you succeed with your health and wellness goals, I offer holistic nutrition consultations as well as wellness coaching.
References:
Fierascu, R. C., Fierascu, I., Ortan, A., Fierascu, I. C., Anuta, V., Velescu, B. S., … Dinu-Pirvu, C. E. (2019). Leonurus cardiaca L. as a Source of Bioactive Compounds: An Update of the European Medicines Agency Assessment Report (2010). BioMed Research International, 2019, 4303215. doi:10.1155/2019/4303215
Holubarsch, C., Colucci, W. S., & Eha, J. (2018). Benefit-Risk Assessment of Crataegus Extract WS 1442: An Evidence-Based Review. American Journal of Cardiovascular Drugs : Drugs, Devices, and Other Interventions, 18(1), 25–36. doi:10.1007/s40256-017-0249-9
John Hopkins Medicine. (2019). Types of Complementary and Alternative Medicine. Retrieved from https://www.hopkinsmedicine.org/health/wellness-and-prevention/types-of-complementary-and-alternative-medicine
NIH National Center for Complementary and Integrative Health. (2017). The use of Complementary and Alternative Medicine in the United States. Retrieved from https://nccih.nih.gov/research/statistics/2007/camsurvey_fs1.htm
NIH National Center for Complementary and Integrative Health. (2019). Complementary, Alternative, or Integrative Health: What’s in a Name? Retrieved from https://nccih.nih.gov/health/integrative-health
Patwardhan, B. (2014). Bridging Ayurveda with evidence-based scientific approaches in medicine. The EPMA Journal, 5(1), 19. doi:10.1186/1878-5085-5-19
*These statements have not been evaluated by the Food and Drug Administration. These products are not intended to diagnose, treat, cure, or prevent any disease. This information is for educational purposes only.
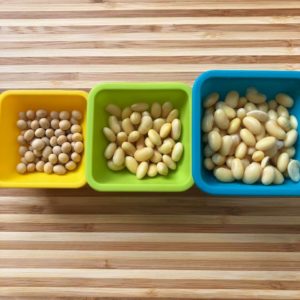 Recently, I had to cook a batch of soybeans for a client. Yes, they were organic and non-GMO, and it took some time to find. If you are lucky to live near a Natural Food Store such as Rainbow Grocery in San Francisco or others that carry them in bulk, that’s great. Online shopping is another option; the Nuts.com, Amazon, and some farmers sell the dried beans online.
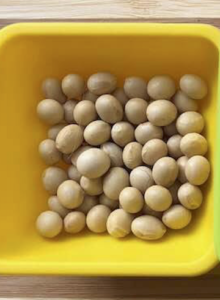

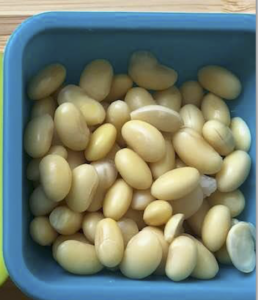 Fully cooked soybeans. They expanded just a bit more during cooking and sweating process.
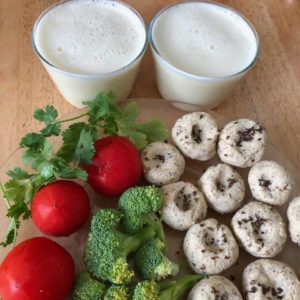 Homemade soymilk and the bean balls.